Saturday, October 25, 2014

Using Optical Illusions to Teach Perspective

One of my favorite things to teach is perspective drawing.  I normally would introduce the concepts using mini lessons, introducing the vanishing point and one and then two point perspective.  We would draw increasingly difficult house features, interior spaces and monster trucks.


This marking period, I thought I would try to introduce some of the concepts of creating depth on a 2D surface through figuring out how to make optical illusions. We started with making some impossible shape drawings. 


We then moved on to playing with the shape of the paper and the cast shadows. We are still novices, but I'm pretty proud of my 6th, 7th and 8th graders attempts.


This activity also slyly introduced the importance of using value to create volume. If we were in class together longer than nine weeks, I would have pushed them a little more in developing that skill. 


Hovering basketballs…oooooh


The kids also enjoyed coming up with ways to create disasters. the drawing above is of a students mom's minivan falling through the street. That would be a bad day!


Above: One of the practice drawings we made as a class to learn the basics of perspective as they apply to creating illusions. They loved this one and begged to take it home right away! (I found the example online.)


I think this student is right, UFOs probably did take away all of the bigfoot creatures.


Above: One of the practice drawings we did as a class so they could understand some of the "rules" of creating believable optical illusions. (Also, an example I found online, I didn't really know how they were made myself until I started playing around with it). I think it is important to let your students know you are learning all the time too. 


Watch out for never ending portals!

Wednesday, October 15, 2014

Artists Experiment with Materials and Ideas

"Let's just see what happens." says one of my 8th grade boys to his tablemates as he dips one his experimental mini lesson samples into the dirty water container.


The new National Core Art Standards are intentional about encouraging students to take creative risks, experimenting with both ideas and materials.


A typical class periods "Learning Targets" and "Success Criteria"
Before we begin each art problem, my student will have a few days in preparation talking and sketching about ideas they can use to approach the problem and they play with different media that they might want to explore further in their final piece. In the photo above, my students are experimenting "painting without paint" and are creating mini samples on budget watercolor paper with coffee, different flavors of tea, dried out marker foam inserts that had been soaking in warm water, koolaid flavors, and tissue paper that bleeds. They applied the media with the tea bags, straws and even their fingers.
The next day, we worked back into the samples with fine tip sharpies, watercolor pencils and watercolor crayons. In two days time, the students are introduced to a wealth of art making strategies that they can have in their toolbox for future use as they so choose. Making the samples is important as it helps encourage risk taking. They can play with their ideas in a smaller, less risky place and if it doesn't work, they discover that it's ok, really. They can try something new and just see what happens.  In the photo to the right, the students are spending just a few minutes of a few class periods thinking about their ideas in new ways; in example, how could they apply their idea as a diorama, as a sculpture, as a painting, as part of a series of works, by incorporating an older peice of work made in class, etc. I've found that it's helpful to stretch the planning time for a problem over a few days in smaller chunks rather than doing all of the planning in one full class period. Their ideas are richer, they seem more engaged in the lanning process, and they actually spend more time thinking about their work in new ways (growing creatively), in the long run.
 

 Intentionally building play and creative risk taking into the curriculum is essential for teaching for creative growth.


Sunday, October 12, 2014

Creepy Cute Challenge

Inspired by a lesson from Olivia Gude's Spiral Workshop , My students investigated the Creepy/Cute Aesthetic. I showed them a Blendspace collection of images and videos I found online that explored the psychology of what makes something creepy and what makes something cute. Click here for the link to everything I showed my students.

Essentially,  it comes down to this:

You can make anything cute by "babyfying it". Make it soft and give it rounded edges, smaller than normal and, if it has facial features, it should have big smiling eyes.

You can make anything more creepy by bringing it close to the edge of really human like, but obviously not really behaving like a human should. ie. clowns, porcelain dolls, mannequins,etc. The more human like it is, but it's just a little "off" in the way it behaves,  it gives you the creeps. Not grossed out, just makes you uncomfortable.

There is actually a psychological definition for this uncomfortable mental space. It's called the "Uncanny Valley". V Sauce (One of my favorite You Tube characters), makes a great video about it here.

One of the fun parts about being an artist and teaching kids how to make art, is to give them the tools to make the viewer feel and respond a certain way. The challenge for this creative problem was to encourage the viewer to either respond with "Awwww, it's soooo cute!" or "Ewww, that gives me the creeps!"


Ummm, ok, yuck.

Here are some of my students responses to this creative challenge. Many of them altered their own photographs digitally using free photo editing apps.  Some made their dog cuter by enlarging his eyes or themselves or a baby sibling creepier by making it just a little "off" and then worked from there to create drawings. At the end of the challenge, they lined their work up and made a scale ranging from the creepiest to the cutest. It was a fun conversation. I bet they won't forget this project for a long time!


Don't look behind the curtain! 


What is up with those eyes?

An undead baby sister, creepy!

Not sure where this fit on the scale, but it sure was interesting.

Enhanced for cuteness family pet drawing

One of the hourly line ups taking shape


Ooooooo Ooooooo...


A

"Improved" Artwork

Last year, one of the marking period themes was "Humor". Inspired by remix artists my students and I have seen online, we scavenged up some large old framed prints for my students to "improve".  Here are some of their works. I hope they make you giggle as much as my middle school artists did while they were painting them.
Warning! This beach has sea dragons!

If you can add a Lego knight and a castle, you probably should.

Lizard Lady. I actually prefer this version better than the original. :)

This work was made by one of my cognitively impaired students, he was soo proud!

Guerrilla Kindness

Do your students beg you for homework? Mine do, probably because they know it would be fun.  So, last winter, I challenged them to spread a little "guerrilla" kindness in the world.  Some kids shoveled driveways for free, others cleaned their rooms without asking, some left notes for strangers to find. Here are a few of the examples they shared with me. I was told by one staff member that one of her 8th grade "tough" girls returned from a bathroom break almost in tears because she was so happy to see these post its! I have the best job!


5 Minute Design (A warm up game)

 I’ve completely made it up and it definitely needs some tweaking, but the rules are essentially this:
The whole class is introduced to the method of the game. The point of the game is to increase ideation fluency, collaboration, risk taking and communication skills. To get them thinking on their feet quickly, I project the descriptions of the steps on the screen and just watch the clock and tell them when to move to the next step. If you are comfortable with using a timer, that might be nice too. It’s not really “design thinking” as much as it forces them to get moving fast. If you teach adolescents in the morning, you might understand the need this game is providing. :) So far, it’s been a warm up the kids have liked (middle school). The students work in groups of four – six. Sometimes they work by table and sometimes I break the group up into different configurations so they work with new people.
I try to pick objects for them to redesign that they already feel comfortable with and use on a nearly daily basis, and something I have in my classroom for them to look at as they think. Examples: backpack, flashlight, pencil case, etc
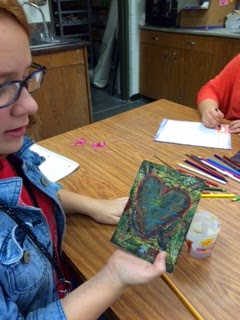
A crayon picture I made for an assessment workshop, just so this post wouldn't be visually boring. You're welcome.
1 minute – kids quietly and independently list everything they know about that particular object in their sketchbooks
1 minute – team makes a pro/con list about the object they are redesigning. They need to list all of the good things worth keeping and the problems they have had with that object. Ex backpack "pro" is that you can find it in many colors/patterns and a backpack "con" could be that the zippers can break.
2 minutes – team makes sketches and plans to enhance the "pros" and repair the "cons". Like they say at IDEO, “All ideas are good ideas” and for this game money and practicality are not obstacles. :)
1 minute – team plans a creative presentation. I require my students to at least stand up front with their team, even if they choose not to be the one speaking. As the marking period goes on, I find that they gain a little more courage, and eventually, most kids will speak at some point. Now that we have crossed the halfway marker of the marking period, the presentations have actually gotten pretty good, despite the one minute planning time for them. They usually involve some sort of physical interaction with said object and jet packs or invisibility cloaks. 
We spend about 5 – 10 minutes watching the team presentations with time for clapping/cheering and questions/comments in between groups. If you wanted to extend this, you could have the kids ask questions and then ask the teams to go back and redesign their work and re – present. I haven’t tried that yet, but it’s an idea.